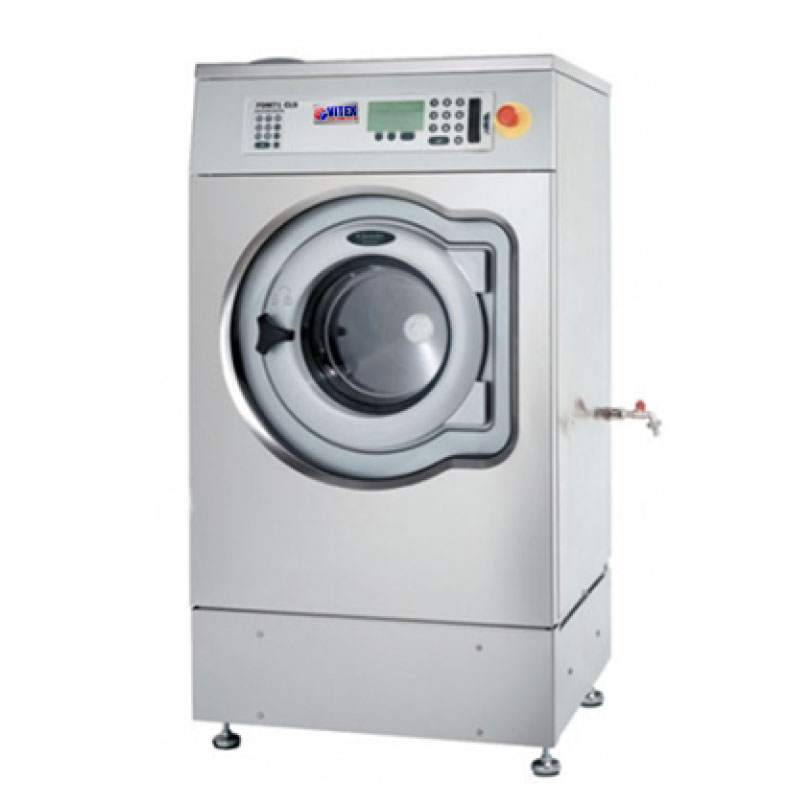
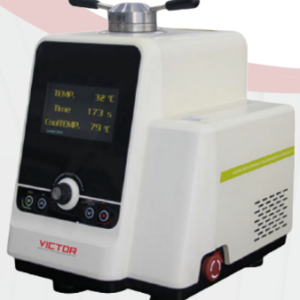
VIT 174 – Wascator FOM 71 CLS Lab Washer-Extractor for Textile Testing

[product_tags_no_comma_alt]

Application

The Wascator FOM 71 CLS Lab Washer-Extractor is a standard reference washing machine, designed for precise and reliable textile testing. This microprocessor-controlled washing machine allows up to 999 custom washing and drying programs to be created, stored, and accessed via the keyboard. It is ideal for testing fabric shrinkage, wash durability, and other textile properties, conforming to various industry standards. Standard test programs for BS, ISO, and IWS are available on request.

What is Wascator?
The Wascator is a laboratory washing machine that complies with international standards for measuring fabric shrinkage during washing. It is used extensively for precision testing in textile labs, particularly in industries where fabric performance, such as shrinkage or durability, is critical. Regular maintenance and cleaning are necessary to ensure optimal machine function.

Testing Method

Maintenance Procedure for Wascator Washing Machine
To maintain the Wascator washing machine and ensure it continues to run efficiently, regular cleaning is essential. The draw-off valve cleaning is one of the common maintenance tasks. If the system encounters an issue, the alarm will show “NO WATER” or “NOT DRAINED.”

Materials/Tools Required for Cleaning

  • Wascator Washing Machine
  • 10mm sleeve
  • CR-V T30 (Plum screwdriver)
  • CR-V T20 Phillips screwdriver

Steps for Cleaning the Draw-Off Valve

  1. Detach the Baffle: Use the Phillips screwdriver to remove the baffle covering the drain valve.
  2. Remove the Drain Valve: Use the screwdriver to detach the fixing screw connecting the roller and drain valve rubber hose.
  3. Clean the Valve: Pull down both ends of the drain valve and clean thoroughly.
  4. Reassemble: After cleaning, carefully reposition the parts back into place, tighten the screws, and ensure everything is securely fastened.
  5. Startup: After completing the cleaning and reassembly, restart the machine.

Maintenance Tips

  • Always check each component for cleanliness to avoid repeating the cleaning process unnecessarily.
  • Ensure all machine parts are positioned correctly before tightening the screws to prevent issues during operation.

Specification

Standards

  • M&S P1, P1A, P3A, P12, P91, P99, P99A, P134
  • BS EN 25077/26330
  • ISO 5077/6330
  • IEC 456

Power
220 / 110 V 50/60 Hz

Weight
200 Kg

Dimensions

  • Length: 760mm
  • Width: 780mm
  • Height: 1600mm
  • Weight: 200kg

Coming Soon

Application

The Wascator FOM 71 CLS Lab Washer-Extractor is a standard reference washing machine, designed for precise and reliable textile testing. This microprocessor-controlled washing machine allows up to 999 custom washing and drying programs to be created, stored, and accessed via the keyboard. It is ideal for testing fabric shrinkage, wash durability, and other textile properties, conforming to various industry standards. Standard test programs for BS, ISO, and IWS are available on request.

What is Wascator?
The Wascator is a laboratory washing machine that complies with international standards for measuring fabric shrinkage during washing. It is used extensively for precision testing in textile labs, particularly in industries where fabric performance, such as shrinkage or durability, is critical. Regular maintenance and cleaning are necessary to ensure optimal machine function.

Testing Method

Maintenance Procedure for Wascator Washing Machine
To maintain the Wascator washing machine and ensure it continues to run efficiently, regular cleaning is essential. The draw-off valve cleaning is one of the common maintenance tasks. If the system encounters an issue, the alarm will show “NO WATER” or “NOT DRAINED.”

Materials/Tools Required for Cleaning

  • Wascator Washing Machine
  • 10mm sleeve
  • CR-V T30 (Plum screwdriver)
  • CR-V T20 Phillips screwdriver

Steps for Cleaning the Draw-Off Valve

  1. Detach the Baffle: Use the Phillips screwdriver to remove the baffle covering the drain valve.
  2. Remove the Drain Valve: Use the screwdriver to detach the fixing screw connecting the roller and drain valve rubber hose.
  3. Clean the Valve: Pull down both ends of the drain valve and clean thoroughly.
  4. Reassemble: After cleaning, carefully reposition the parts back into place, tighten the screws, and ensure everything is securely fastened.
  5. Startup: After completing the cleaning and reassembly, restart the machine.

Maintenance Tips

  • Always check each component for cleanliness to avoid repeating the cleaning process unnecessarily.
  • Ensure all machine parts are positioned correctly before tightening the screws to prevent issues during operation.

Specification

Standards

  • M&S P1, P1A, P3A, P12, P91, P99, P99A, P134
  • BS EN 25077/26330
  • ISO 5077/6330
  • IEC 456

Power
220 / 110 V 50/60 Hz

Weight
200 Kg

Dimensions

  • Length: 760mm
  • Width: 780mm
  • Height: 1600mm
  • Weight: 200kg

Coming Soon

Save Big on High-Precision Tools!
Get up to 30% off on selected testing machines. Hurry, offer ends soon!
Need Expert Advice?
Speak with our specialists to find the perfect engineering equipment for your needs.

Request a Quote or Further Information

Please fill in the request form below and one of our engineers will contact you to discuss your system requirements and if we can help, our typical response time is within 1 – 3 working day.

What you should know

Well, there's a few conditions that apply:

  • You agree NOT to pay us for this service.
  • You're comfortable with supplying us with relevant information in this form as well as other relevant information surrounding the request, for example; what you want, how many, delivery deadlines, restrictions on the location of the supplier, price targets etc.
  • We may only process requests where the email address submitted matches the company name. We may not respond to free email accounts such as Hotmail.
  • You agree that all information provided in this inquiry form represents yourself or an entity that you can speak for, that the information is accurate to the best of your knowledge and that if we determine that you have given false information we may choose not to proceed with this request.
  • You accept that, the operators of this site, cannot guarantee the suitability of any materials, equipment or services you may purchase from a supplier we've contacted on your behalf. You must check that out with the supplier.
  • We respect your privacy and only pass on the details contained in your request to appropriate suppliers in accordance to your inquiry. As we will share your information with related suppliers, we need your permission to do this by you clicking the submit button. We respect your privacy and promise you will only receive related information in accordance with testing and measuring instruments or equipment news and updates. You can unsubscribe from any of these services at any time by simply forwarding an email to [email protected].
  • We can't guarantee that the supplier will respond and if they don't, you agree you won't get angry with us. However, if you don't receive a response within 10 working days, please send us a follow-up message and we'll try and help further.